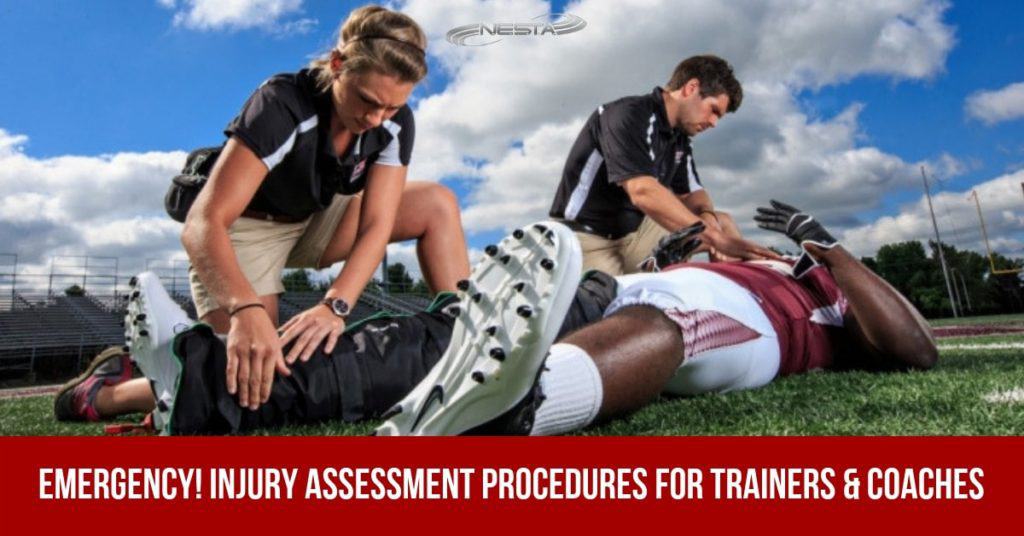
When one of your clients or athletes experiences an injury or medical emergency—in your own gym or out in public—what can you do to help? Calling 911 is a great place to start, but in many cases, your knowledge and ability to address the situation during those first few minutes can have a big impact.
Controlling Bleeding
The color and nature of the blood emanating from a wound can provide some indication of the source of the blood
-
- Venous blood is dark red with a continuous flow
- Capillary blood exudes from tissue and appears reddish
- Arterial blood flows in spurts and appears bright red
Universal precautions must be taken to reduce the risk of bloodborne pathogens exposure
Universal Precautions
Protect you and the injured person against bloodborne infection, such as HIV, Hepatitis B, or Hepatitis C
OSHA Guidelines:
-
- Wear gloves and protective clothing
- Use sterile materials to stop bleeding
- Discard bloodied material in bio-hazard bag or sharps container (red with black label)
- Cover all wounds, new and old
- Change clothing to avoid infecting others
External Bleeding
Three methods to decrease external bleeding:
- Direct Pressure: Firm pressure (using hand and sterile gauze) placed directly over the site of injury or against the bone.
- Elevation: Reduces hydrostatic pressure and facilitates venous and lymphatic drainage – slows bleeding.
- Pressure Points: For upper or lower extremity bleeding, apply direct pressure to one of two major points on either side of the body to slow bleeding. This technique should be used as a last resort, in cases where direct pressure has failed and should not be pressed for longer than 5 minutes.
- brachial artery on the inside of upper arm
- femoral artery in bend between the front of the upper thigh and hip
Basic Wound Care and Covering
-
- Clean the wound with soap and water and a sterile gauze pad. Follow with an antiseptic, hydrogen peroxide or Betadine.
- Put the antiseptic, peroxide or Betadine on the sterile gauze. Do not contaminate the container by placing the used gauze on the rim of the bottle.
- Clean the wound starting from the center and moving outward.
- Put a small amount of antibiotic ointment (Neosporin, Bacitracin) on a non-stick pad and place it over the wound. Do not contaminate the tube by putting the ointment on your finger or directly on the wound.
- If necessary, secure the non-stick pad with tape.
- Occlusive dressings, such as a semi-permeable film may be used in a sports setting to minimize scabbing, guard against bacteria, and decrease exposed nerve endings.
- Dispose of all contaminated material in a biohazard bag.
- Change dressing daily.
- Keep the wound moist.
- Refer to a medical doctor if signs of infection develop,
Signs of infection:
-
- The wound is red, swollen, hot, and tender
- lymph glands near the wound are tender and swollen
- formation of pus (accumulation of white blood cells)
- a headache
- mild fever
If the wound appears to need stitches, do so as soon as possible, preferably within 6 hours. 12 hours is usually maximum.
Internal Bleeding (Hemorrhage)
- Difficult to detect and must be hospitalized for treatment because bleeding is invisible unless seen through the body opening, X-ray, or other diagnostic techniques
- Bleeding within the body cavity (skull, chest, abdomen) could result in death
- Could lead to shock if not treated promptly
Managing Shock
-
- Generally occurs with severe bleeding, fracture, or internal injuries
- The result of a decrease in blood available in the circulatory system and dilated blood vessels
- Movement of blood cells slows, decreasing oxygen transport to the body
- Signs and Symptoms
- Skin moist, pale, cold, and clammy
- Pulse weak rapid
- Increasing shallow respiration
- Decreased blood pressure
- Irritability or excitement
- Potential thirst
- Management
- Maintain core body temperature
- Elevate feet and legs 8”-12” above the heart, unless head injury or un-splinted leg fracture
- Keep person calm
- Limit onlookers and spectators
- Reassure the person
- Do not give anything by mouth until instructed by a physician.
- Once stable, begin Secondary Survey
Conducting a Secondary Survey
The secondary survey consists of nine (9) vital signs to be recognized and monitored
- Pulse – expressed in the number of heartbeats per minute. To be taken at the carotid or radial arteries. The average resting pulse is 60 – 80 bpm. Pulse can be described as slow/rapid and/or weak/strong.
- Breathing rate (respiration) – 12 breaths per minute is average for resting adults. Can be described as shallow, irregular, or gasping. Look, listen and feel for signs of breathing.
- Blood pressure – Systolic pressure/diastolic pressure are expressed in millimeters of mercury, e.g. 120/80. Systolic readings measure pressure in the system when the heart pumps. Diastolic readings measure pressure in the system when the heart is between pumps (residual pressure).
- Body Temperature – normal core temperature is 98.6 degrees Fahrenheit
- Skin color –pale, cool, or clammy skin signals shock. Red skin is a sign of heatstroke or high blood pressure. Blue skin (cyanosis) of lips or fingernails signals oxygen deprivation.
- Pupils – should be equal and not dilated or constricted;
(P.E.A.R.L.) = Pupils Equal And Reactive to Light; responsiveness of pupils is more important than size of pupils. - Muscular Response – the strength of muscles should be even bilaterally
- Sensory changes – loss of sensory responses, such as having no reaction to painful stimuli, may signal nerve damage
- Level of consciousness – their level of awareness – are they alert? Do they respond quickly to vocal stimuli?
Immediate Treatment Following Acute Injury
- The primary goal is to limit swelling and extent of hemorrhaging
- If controlled initially, recovery time will be greatly reduced
- Control with P.R.I.C.E.
- Protect – Immobolize for transport
- Rest – Permits injury to begin healing; rest time varies depending on the injury
- Ice – decreases swelling, pain, spasm and nerve transmission. Apply for 20 minutes every 1½ hours. If applied longer than 20 minutes, the body can defensively react to the onset of frostbite by generating heat in the affected area. Additionally, ice applied beyond 20 minutes can burn the skin. If utilizing an ice bath, the water temperature should be 55 degrees Fahrenheit for optimal reduction of swelling. Ice baths colder than 55 degrees are not any more effective at decreasing swelling.
- Compress – An elastic wrap (Ace bandage) decreases the space for swelling to fill the injured area. Compression is probably the most effective method for minimizing swelling of the injured area.
- Elevation – counteracts the pull of gravity, and encourages the venous return of blood from the injured area. Elevating the injured area above heart-level is recommended, but newer studies suggest that, despite the elevation of injured areas, swelling rapidly returns.
Rules of Emergency Splinting
- A suspected fracture should always be splinted prior to moving person. Without pro-per immobilization, increased damage and hemorrhage can occur (potentially death) if handled improperly.
- Splint one joint above and one joint below the fracture
- Splint injury in the position it was found
Splinting of Lower Limb Fractures
- Fractures of foot and ankle require splinting of foot and knee
- Fractures involving knee, thigh, or hip require splinting of entire leg and one side of the trunk
- Check capillary refill by depressing toenail firmly and releasing. Normal refill time is immediate; reduced refill time signals circulatory damage.
Splinting of Upper Limb Fractures
- Shoulder splinting is difficult but possible utilizing a sling and swathe, keeping upper limb bound to the body.
- Upper arm and elbow should be splinted with the elbow extended to lessen bone override
Lower arm and wrist fractures should be splinted in a position of elbow flexion and supported by a sling. - Hand and finger fractures/dislocations should be splinted in the position found. In the absence of pliable aluminum splints, utilize an object that will best maintain the hand/finger in the position it was found.
- Check capillary refill on fingernails.
Splinting of the spine and pelvis
- Best splinted and moved by trained personnel using a spine board.
Rapid Form Immobilizer Splint
- Available for both upper and lower extremity application.
- Constructed of Styrofoam chips sealed in an airtight sleeve that mold to extremity and secure with Velcro straps.
Air Splint
- Clear plastic splint placed around affected part and inflated with air.
- Simple in design, but requires practice to be applied properly.
- Do not use if doing so will alter fracture deformity.
- Provides moderate pressure.
- Permits x-rays without removal of splint.
Transporting An Injured Person
When possible, transporting an injured person should be executed by trained personnel, as improper techniques can result in further injury.
Ambulatory Aid
- Assisting an injured person with walking, only after serious injury ruled out.
- Sturdy and level support should be provided on both sides by individuals of equal height.
- Arms of the injured person are draped over shoulders of assistants, with their arms encircling injured person’s back.
Manual Conveyance
- Used to move mildly injured person a greater distance than could be walked with ease.
- The carry is performed by two assistants, each placing one arm behind the back and under the thighs of the injured person to create a makeshift “chair”.
- Assistants should grasp each other’s forearms for added stability – do not clasp hands
Stretcher Carrying
- Best and safest mode of transport.
- With full body supported by multiple assistants, the splinted person is lifted and placed gently on a stretcher.
- Various injuries will require different positioning on a stretcher.
Crutch Fitting
- When measuring, crutch tips should be placed 6” from the lateral edge of shoe and 2” in front of the shoe.
- Crutch pad should be positioned 1” below the armpit.
- Hand brace should be positioned such that when grasped, the user’s elbow maintains 30 degrees of flexion
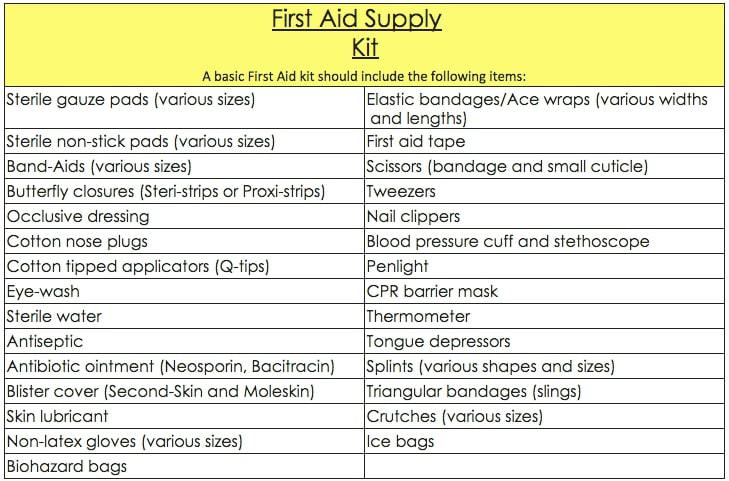
First aid supply Kit

Learn more about recognizing and how to handle sports injuries in the Sports Injury Specialist program.


