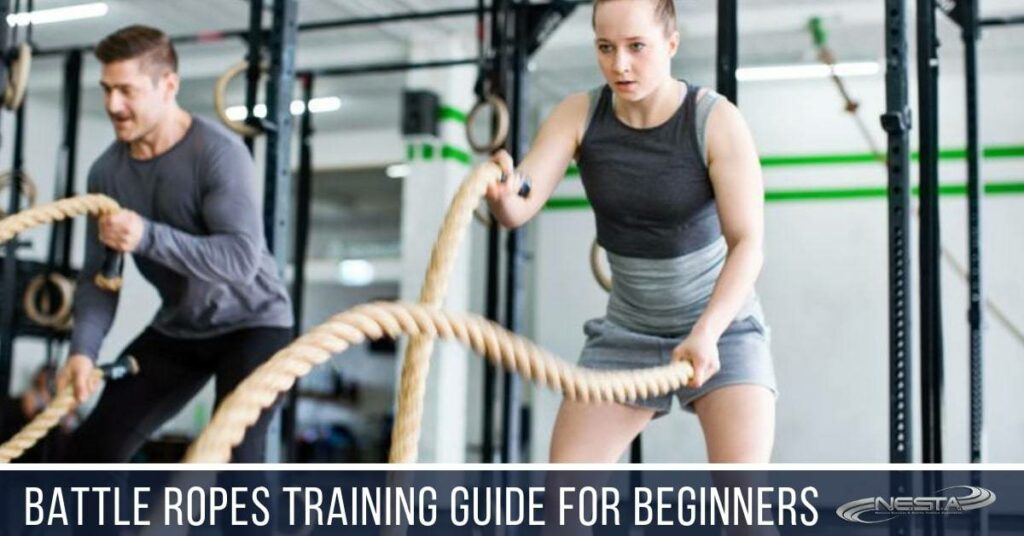

The art of ‘battling rope’ was pioneered by John Brookfield, a strongman, and originator of the Battle Ropes System and Certification. Brookfield trained with battle ropes by maneuvering them in a variety of both linear and circular motions to create a peak heart rate in an athlete. Battle ropes are commonly used as a metabolic conditioning and HIIT tool to develop an athlete’s power, explosiveness, as well as their anaerobic and aerobic endurance.
Resistance/Difficulty
There are two simple ways to increase resistance. The first is to simply move farther back on the rope, away from the anchor point. Even moving back a foot at a time can make enough of a difference.
The second way to make an exercise more challenging is to maintain your position (don’t move your feet) but move your hands on the rope just a little closer to the attachment point. This creates more tension in the rope, which requires you to pull harder to maintain your position and keep the rope off the floor.
Volume
Treat these exercises as you would any other resistance training movements. Set and rep schemes can vary, whether doing isometric holds for time or performing a certain number of sets, consisting of specified reps or time intervals.
Common Mistakes
1. Not using the proper motion to get the ropes off the ground
People often lean back to use their body weight to get the rope off the ground or they might pull the rope in a rowing motion or bicep curl. While both of those actively get the rope off the ground, they don’t set your body up to gain the benefit of how this entire system works. Be sure to use your strength to get the rope off the ground and keep the forearm vertical as you pull – don’t let the elbows drift backward and don’t lean your body back. In the right position, you’ll feel the entire body starting to work.
2. Trying to perform all movements from the same position on the rope
The length of the rope is the equivalent to a rack of dumbbells. Just as you would use a different weight to perform a chest press versus an overhead press, you should also stand different distances from the pole to challenge yourself appropriately in each movement. Remember, the closer you stand to the anchor point, the easier the exercise becomes, and the farther you stand from the anchor point, the more challenging it becomes.
3. Letting the ropes touch the ground during your movement
In order to gain the true benefits of the push/pull strength exercises, you MUST keep the entire length of rope off the ground at all times AFTER you find your start position. Maintain the tension in your rope from start to finish in each exercise.
Basic Exercises
1. Isometric hold (Isometric lock)
This exercise is a foundation push-pull movement. You should be able to hold this position correctly for 20-30 seconds before adding movement. If you are unable to do this properly, this can indicate a lack of stability in the shoulder. This isometric hold can help build the stability you need to progress within the system.
Stand facing your rope, between the ends and the anchor point. The closer you stand to the anchor point, the easier the exercise will be and the farther you stand away from the anchor point (closer to the ends of the rope) the harder it will be.
Grab the underside of the rope, one rope in each hand, palms facing each other with a neutral grip, knuckles toward the ceiling.
Follow the standard rule – start with your hands at the same height as they are at the start of the movement BUT closer to the anchor point with slack in the rope and with the ropes touching the floor. For this isometric hold, we are preparing for an overhead press, so the hands should be at shoulder height.
Anchor your hips by “sitting” into an athletic stance and be sure not to lean the body backward. Keep the hips under the shoulders and actively pull your hands toward your shoulders until the ropes are off the floor. Your position here should resemble the starting position for a neutral grip overhead press.
Don’t pull using a rowing motion or a bicep curl – the elbows should stay under the wrists and the arms can open out slightly to the sides as you pull.
When you are in the correct position, you should feel your entire body fighting to prevent getting pulled forward – your core and shoulders working like crazy and even your toes digging into the floor.
Hold this position for time and be sure to maintain quality in this position.
2. Overhead Press
Stand facing your rope, between the ends and the anchor point. The closer you stand to the anchor point, the easier the exercise will be and the farther you stand away from the anchor point (closer to the ends of the rope), the harder it will be.
Grab the underside of the rope, one rope in each hand, palms facing each other with a neutral grip, knuckles toward the ceiling.
Follow the standard rule – start with your hands at the same height as they are at the start of the movement BUT closer to the anchor point with slack in the rope and with the ropes touching the floor. Because you are preparing for an overhead press, the hands should be at shoulder height but out in front of you.
Anchor your hips by “sitting” into an athletic stance and be sure not to lean the body backward. Keep the hips under the shoulders and actively pull your hands toward your shoulders until the ropes are off the floor. Your position here should resemble the starting position for a traditional neutral grip overhead press.
Don’t pull using a rowing motion or a bicep curl – the elbows should stay under the wrists and the arms can open out slightly to the sides as you pull.
When you are in the correct position, you should feel your entire body fighting to prevent getting pulled forward – your core and shoulders working like crazy and even your toes digging into the floor.
Continue to pull on both ropes as you press both arms overhead just as you would with dumbbells.
Your hands might move a little forward as you push up, due to the angle of the ropes between your hands and the ground. As long as you continue to pull back on the ropes, this is an acceptable movement pattern.
As you lower your hands back toward your shoulders, continue to pull back on the ropes – do not let your ropes touch the floor at any time throughout the exercise until you have completed all reps/time in your set.
3. Alternating overhead press
Stand facing your rope, between the ends and the anchor point. The closer you stand to the anchor point, the easier the exercise will be and the farther you stand away from the anchor point (closer to the ends of the rope), the harder it will be.
Grab the underside of the rope, one rope in each hand, palms facing each other with a neutral grip, knuckles toward the ceiling.
Follow the standard rule – start with your hands at the same height as they are at the start of the movement BUT closer to the anchor point with slack in the rope and with the ropes touching the floor.
Because you are preparing for an overhead press, the hands should be at shoulder height but out in front of you. Anchor your hips by “sitting” into an athletic stance and be sure not to lean the body backward. Keep the hips under the shoulders and actively pull your hands toward your shoulders until the ropes are off the floor. Your position here should resemble the starting position for a traditional neutral grip overhead press.
Don’t pull using a rowing motion or a bicep curl – the elbows should stay under the wrists and the arms can open out slightly to the sides as you pull.
When you are in the correct position, you should feel your entire body fighting to prevent getting pulled forward – your core and shoulders working like crazy and even your toes digging into the floor.
Continue to pull on both ropes as you press one arm overhead just as you would with dumbbells.
Be sure the rope in the bottom arm stays off the ground as the opposite arm presses overhead.
You may either complete all reps/time on one side and then switch arms, or you may alternate arms.
Your hand might move a little forward as you push up, due to the angle of the ropes between your hands and the ground. As long as you continue to pull back on the rope, this is an acceptable movement pattern.
As you lower your hand back toward your shoulders, continue to pull back on the ropes – do not let your ropes touch the floor at any time throughout the exercise until you have completed all reps/time in your set.
4. Press into crucifix
***This position is extremely challenging – stand closer to your attachment point than you did for the regular overhead press in order to try this exercise.***
Stand facing your rope, between the ends and the anchor point. The closer you stand to the anchor point, the easier the exercise will be and the farther you stand away from the anchor point (closer to the ends of the rope), the harder it will be.
Grab the underside of the rope, one rope in each hand, palms facing each other with a neutral grip, knuckles toward the ceiling.
Follow the standard rule – start with your hands at the same height as they are at the start of the movement BUT closer to the anchor point with slack in the rope and with the ropes touching the floor. For this isometric hold, we are preparing for an overhead press, so the hands should be at shoulder height.
Anchor your hips by “sitting” into an athletic stance and be sure not to lean the body backward. Keep the hips under the shoulders and actively pull your hands toward your shoulders until the ropes are off the floor. Your position here should resemble the starting position for a traditional neutral grip overhead press.
Don’t pull using a rowing motion or a bicep curl – the elbows should stay under the wrists and the arms can open out slightly to the sides as you pull.
When you are in the correct position, you should feel your entire body fighting to prevent getting pulled forward – your core and shoulders working like crazy and even your toes digging into the floor.
Continue to pull on both ropes as you press both arms overhead just as you would with dumbbells.
Your hands might move a little forward as you push up, due to the angle of the ropes between your hands and the ground. As long as you continue to pull back on the ropes, this is an acceptable movement pattern.
Once both arms are extended overhead, keep the arms straight and lower both arms out to the sides until they reach shoulder level, while continuing to pull back on the ropes.
Once you’ve lowered the arms to shoulder level, bend the arms to bring the hands back toward the shoulders into the starting position, ropes still off the ground.
Do not let your ropes touch the floor at any time throughout the exercise until you have completed all reps/time in your set.
5. Standing circles
Stand facing your rope, between the ends and the anchor point. The closer you stand to the anchor point, the easier the exercise will be and the farther you stand away from the anchor point (closer to the ends of the rope), the harder it will be.
Grab the underside of the rope, one rope in each hand, palms facing each other with a neutral grip, knuckles toward the ceiling.
Follow the standard rule – start with your hands at the same height as they are at the start of the movement BUT closer to the anchor point with slack in the rope and with the ropes touching the floor. Our start position is similar to overhead press, so the hands should be at shoulder height, but in front of the body instead of off to the sides.
Anchor your hips by “sitting” into an athletic stance and be sure not to lean the body backward. Keep the hips under the shoulders and actively pull your hands toward your chest until the ropes are off the floor.
Don’t pull using a rowing motion or a bicep curl – the elbows should stay under the wrists and on this movement specifically, keep the hands closer together as you pull.
When you are in the correct position, you should feel your entire body fighting to prevent getting pulled forward – your core and shoulders working like crazy and even your toes digging into the floor.
Moving both hands together, make a circular pattern with your ropes, moving them up and around, drawing an imaginary circle around your face. Be sure to maintain tension in the ropes, keeping them off the ground at all times.
Perform circles both clockwise and counterclockwise.
6. Kneeling side isometric hold
This exercise is a foundation push-pull movement. You should be able to hold this position correctly for 20-30 seconds before adding movement. If you are unable to do this properly, this can indicate a lack of stability in the shoulder and/or the torso. This isometric hold can help build the stability you need to progress within the system.
Kneel facing sideways, between the ends and the anchor point. The closer you are to the anchor point, the easier the exercise will be and the farther you are away from the anchor point (closer to the ends of the rope), the harder it will be.
Facing sideways increases the challenge of stability. This angle now trains anti-lateral flexion in the torso as well as a different angle of stability in the shoulder joint.
Grab the underside of the rope, one rope in each hand, palms facing away from you, knuckles toward the ceiling. Grab the closer rope to the body with the inside hand (closer to the anchor point) and the other rope with your outside hand.
Follow the standard rule – start with your hands at the same height as they are at the start of the movement BUT closer to the anchor point with slack in the rope and with the ropes touching the floor.
If you are facing with your left shoulder toward the anchor point, start with your hands at shoulder height but off to the left, ropes touching the ground. Your left hand will be a bit outside your left shoulder and your right hand will be in front of your chest.
Pull the ropes to the right into a traditional pressing position – both hands just about at shoulder height and slightly outside the shoulders, palms facing away from you.
Be sure to keep your outside elbow down as you pull. Because the outside arm is pulling away from your midline, the strength and stability of your outside shoulder will be your limiting factor.
Repeat this movement facing both directions.
Hold this position for time and be sure to maintain quality in this position.
7. Kneeling side press
Kneel facing sideways, between the ends and the anchor point. The closer you are to the anchor point, the easier the exercise will be and the farther you are away from the anchor point (closer to the ends of the rope), the harder it will be.
Facing sideways increases the challenge of stability. This angle now trains anti-lateral flexion in the torso as well as a different angle of stability in the shoulder joint.
Grab the underside of the rope, one rope in each hand, palms facing away from you, knuckles toward the ceiling. Grab the closer rope to the body with the inside hand (closer to the anchor point) and the other rope with your outside hand.
Follow the standard rule – start with your hands at the same height as they are at the start of the movement BUT closer to the anchor point with slack in the rope and with the ropes touching the floor.
If you are facing with your left shoulder toward the anchor point, start with your hands at shoulder height but off to the left, ropes touching the ground. Your left hand will be a bit outside your left shoulder and your right hand will be in front of your chest.
Pull the ropes to the right into a traditional pressing position – both hands just about at shoulder height and slightly outside the shoulders, palms facing away from you.
Be sure to keep your outside elbow down as you pull. Because the outside arm is pulling away from your midline, the strength and stability of your outside shoulder will be your limiting factor.
Continue to pull on both ropes as you press both arms overhead just as you would with dumbbells.
Your hands might move a little toward the anchor point as you push up, due to the angle of the ropes between your hands and the ground. As long as you continue to pull back on the ropes, this is an acceptable movement pattern. Also, if you adjust your hands on the ropes, you should be able to find a position where you can move the hands straight up and down without drifting sideways.
As you lower your hands back toward your shoulders, continue to pull back on the ropes – do not let your ropes touch the floor at any time throughout the exercise until you have completed all reps/time in your set.
Repeat facing both directions.
8. Seated side press
Facing sideways, between the ends and the anchor point. You may sit on the floor, or on a chair, box or ball, etc. The closer you are to the anchor point, the easier the exercise will be and the farther you are away from the anchor point (closer to the ends of the rope), the harder it will be.
Facing sideways increases the challenge of stability. This angle now trains anti-lateral flexion in the torso as well as a different angle of stability in the shoulder joint.
Grab the underside of the rope, one rope in each hand, palms facing away from you, knuckles toward the ceiling. Grab the closer rope to the body with the inside hand (closer to the anchor point) and the other rope with your outside hand.
Follow the standard rule – start with your hands at the same height as they are at the start of the movement BUT closer to the anchor point with slack in the rope and with the ropes touching the floor.
If you are facing with your left shoulder toward the anchor point, start with your hands at shoulder height but off to the left, ropes touching the ground. Your left hand will be a bit outside your left shoulder and your right hand will be in front of your chest.
Pull the ropes to the right into a traditional pressing position – both hands just about at shoulder height and slightly outside the shoulders, palms facing away from you.
Be sure to keep your outside elbow down as you pull. Because the outside arm is pulling away from your midline, the strength and stability of your outside shoulder will be your limiting factor.
Continue to pull on both ropes as you press both arms overhead just as you would with dumbbells.
Your hands might move a little toward the anchor point as you push up, due to the angle of the ropes between your hands and the ground. As long as you continue to pull back on the ropes, this is an acceptable movement pattern. Also, if you adjust your hands on the ropes, you should be able to find a position where you can move the hands straight up and down without drifting sideways.
As you lower your hands back toward your shoulders, continue to pull back on the ropes – do not let your ropes touch the floor at any time throughout the exercise until you have completed all reps/time in your set.
Repeat facing both directions.
There are so many ropes exercises that are never known by 99% of fitness pros
Learn the best-kept secrets from the man who created the entire ropes training movement. You can now become a Battle Ropes Coach and world-class conditioning expert using Battling Ropes. Developed by legendary coach and strongman, John Brookfield, is the originator all the Battling Ropes Systems globally is a complete strength and conditioning program like no other.
Check out what it takes to start a career in personal fitness training. This is your most affordable and fastest way to become a highly qualified personal trainer.
There is always something exciting about earning a new training or coaching certification and applying that new knowledge of how you train your clients. This also helps you hit the reset button.
NESTA coaching programs are open to anyone with a desire to learn and help others. There are no prerequisites.
That’s it for now.
Take action!
PS: Click here to see many helpful business/career resources