
Front Squat Vs. Back Squat
The Front Squat is a lower-body exercise that when performed properly will strengthen your client’s legs and hips, especially their quads and glutes.
Front Squats are similar to Back Squats (High Bar and Low Bar Squats), however, the bar is placed on the front side of your client’s shoulders instead of their upper back or traps.
This placement on the front shifts the center of mass forward and gives your clients a more upright posture which makes the Front Squat friendlier on the spine, and a better choice for clients who have difficulty with Back Squats, pre-existing back or shoulder injuries, or a limited range of motion.
A Front Squat also shifts some of the work from your client’s glutes to their quads which makes this one of the most effective lifts for increasing quad strength and size.
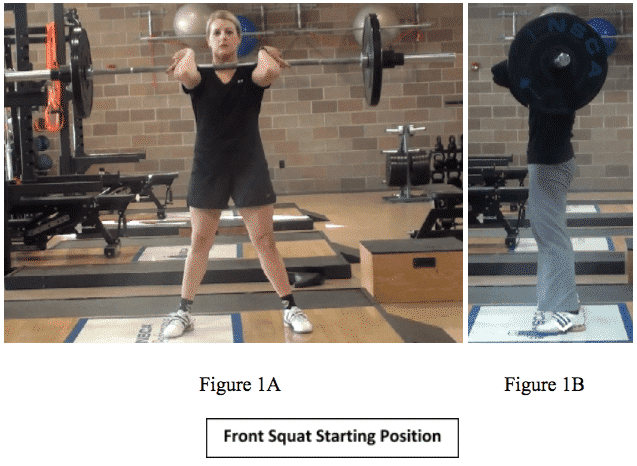
Starting Set-Up
- Step under the bar and position the feet parallel to each other.
- Place the hands on the bar in a Parallel arm position
- Grasp the bar with a closed, pronated grip.
- Some lifters may not be able to fully grasp the bar with full closed, pronated grip
- An alternative method is having the bar rest on the fingertips
- Your Grip should be slightly wider than shoulder width.
- Move up to the bar to place it on top of the anterior deltoids and clavicles.
- Push the elbows up to position the upper arms parallel to the floor.
- Elbows up positions the chest up and out.
- Push the elbows up to position the upper arms parallel to the floor.
- The lifter should be looking straight ahead.
- Stance width should be wider than shoulder width (individualized based on segment lengths) (Figure 1A)

Downward Movement Phase
- Maintain a position with the back flat, elbows high, and the chest up and out.
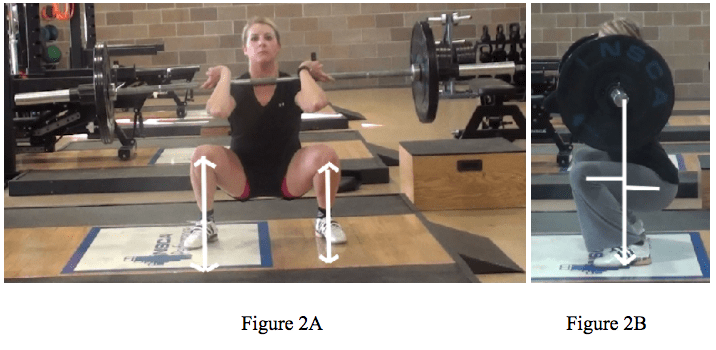
- The lifter begins the descent by allowing the hips and knees to slowly flex (2A, 2B)
- The lifter pushes the knees forward to assist the trunk to remain upright
- The elbows should remain up and parallel to the floor
- Keep the heels on the floor
- The knees should remain aligned over the feet with the knees just over or slightly in front of the toes.
- Do not flex the torso forward or round the back.
- Continue flexing the hips and knees until the thighs are parallel or just below parallel to the floor,
- Stop the downward movement if:
- The trunk begins to round or flex forward.
- The heels rise off the floor.
- The hips tuck under (posterior tilt of the pelvis).
- At the bottom of the front squat (Figures 2A, 2B)
- Kneecaps are in-line with the angle of the feet (2A)
- Elbows are up and parallel to the floor (2A)
- The line of external force should extend through the mid to rear foot (2B)
- Moments arms are similar for both hip and knee joints (2B)
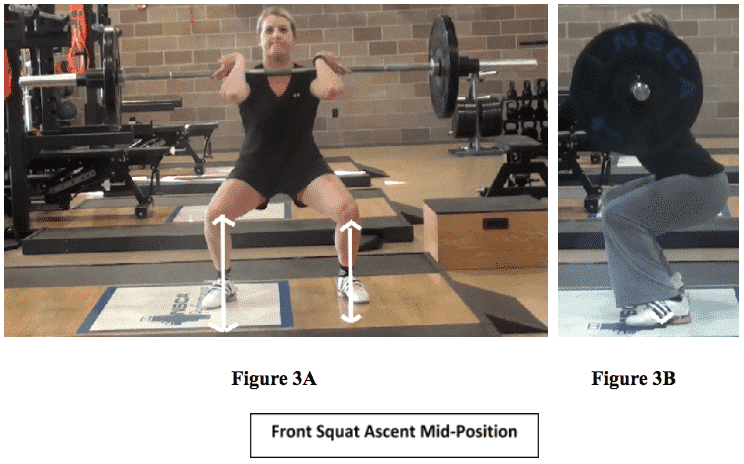
Upward Movement Phase (Figures 3A, B and 4A, B)
- Maintain a position with the back flat, elbows high, and the chest up and out.
- Extend the hips and knees at the same rate (to keep the torso-to-floor angle constant).
- Keep the heels on the floor and the knees aligned over the feet (3A)
- Do not flex the torso forward or round the back.
- Continue extending the hips and knees to reach the starting position (Figures 4A, 4B)

Want to see the Front Squat in action? Check out these great step-by-step videos from CrossFit® and Muscle and Fitness.