Low Bar Squat (AKA Powerlifting Squat)
A Low Bar squat (also known as a powerlifting squat) is often used in powerlifting and strongman-style training and can be a great addition to your athlete clients training routine. Your and your client’s reasoning to a use low bar squat over traditional, high bar squats will depend on yours and their training and competition goals.
Unlike high bar squats, where the bar rests on top of the traps, the low bar squat places the bar further down on the back across the spine of the scapula, aka across your upper back and shoulder muscles.
The low-bar squat is mostly utilized for typically two main reasons:
- To move more weight
- To increase the load on the posterior chain.
A low bar squat loads the posterior chain more by forcing the hips back to handle, absorb, and produce better force. This results in the forward lean of the chest and allows you or your client to lift heavier.
As a personal trainer, or other specialized trainer or coach, it is very important that you are able to understand and execute proper form, especially when teaching your clients and helping them run through their own lifting routines.
Starting Set-upfor the Perfect Squat
- Grasp the bar with a closed, pronated grip (width grip will vary).
- Step under the bar and place the bar in a balanced position just below the top of the trapezius
- Low bar position—across the posterior deltoids at the middle of the trapezius (using a handgrip wider than shoulder-width). Lift the elbows up to create a “shelf” for the bar using the upper back and shoulder muscles (Figure 10).

-
- Push bar upward from squat rack stands and take one step backward
- Position the feet accordingly
- Stance width will be wider than shoulder wider
- Width will vary depending on torso/leg length ratio and individual preference.
- Once individual stance width has been established, the lifter must ensure the feet are in line with where the kneecaps are pointing
- Head looking straight ahead (Figure 11)

Downward Movement Phase
- Maintain a position with the back flat, elbows high, and the chest up and out.
- Lead the movement by moving the hips rearward first then allowing the knees to slowly flex while keeping the torso-to-floor angle relatively constant.
- The lower leg should maintain as vertical as possible
- Varies with individuals
- Keep the heels on the floor and the knees aligned over the feet.
- Knees over the ankles from the front view position (Figure 12A)
- Continue flexing the hips and knees until the thighs are parallel or slightly below parallel to the floor (Figures 12 A and B)
- The external line of force through the ankle (Figure 12B)
- Knee moment arm much smaller than the hip moment arm (Figure 12B)
- Knees over the ankles from the front view position (knees do not buckle inward)
- Discontinue your descent if:
- The trunk begins to round or flex forward
- The heels rise off the floor
- The pelvis tucks under (posterior tilt)

Upward Movement Phase
-
- Maintain a position with a flat back, high elbows, and the chest up and out.
- Extend the hips and knees at the same rate (to keep the torso-to-floor angle constant).
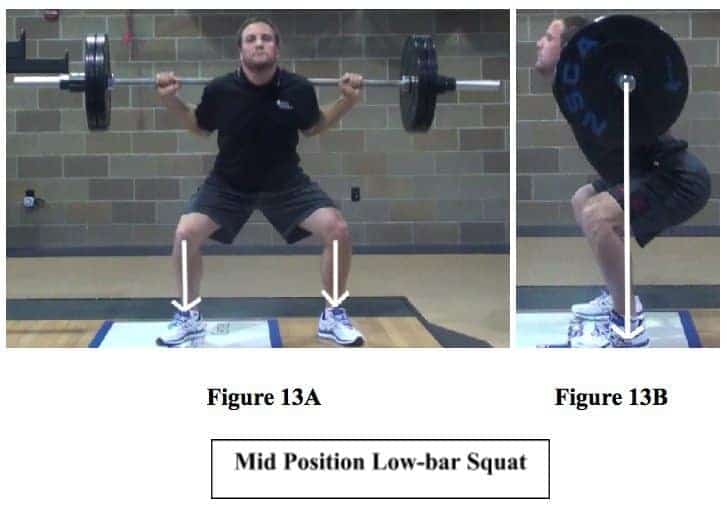
- Keep the heels on the floor and the knees aligned over the feet (Figure 13A)
- Do not flex the torso forward or round the back.
- Continue extending the hips and knees to reach the starting position. (Figure 14A/B)